Wet Mount Slides Made Simple: Clear Prep Every Time
By Omar Haddad • 8th Oct
If you've ever struggled with blurry specimens or air bubbles ruining your viewing session, you're not alone. Mastering microscope slide preparation is the gateway to clear observations, and learning how to make microscope slides properly transforms casual curiosity into reliable discovery. As someone who's helped hundreds of beginners, I've seen how a few simple adjustments can turn frustrating sessions into moments of wonder (like when a child spots her first living tardigrade with nothing but patience and a properly prepared slide).
FAQs About Wet Mount Slide Preparation
What exactly is a wet mount slide, and why should beginners start here?
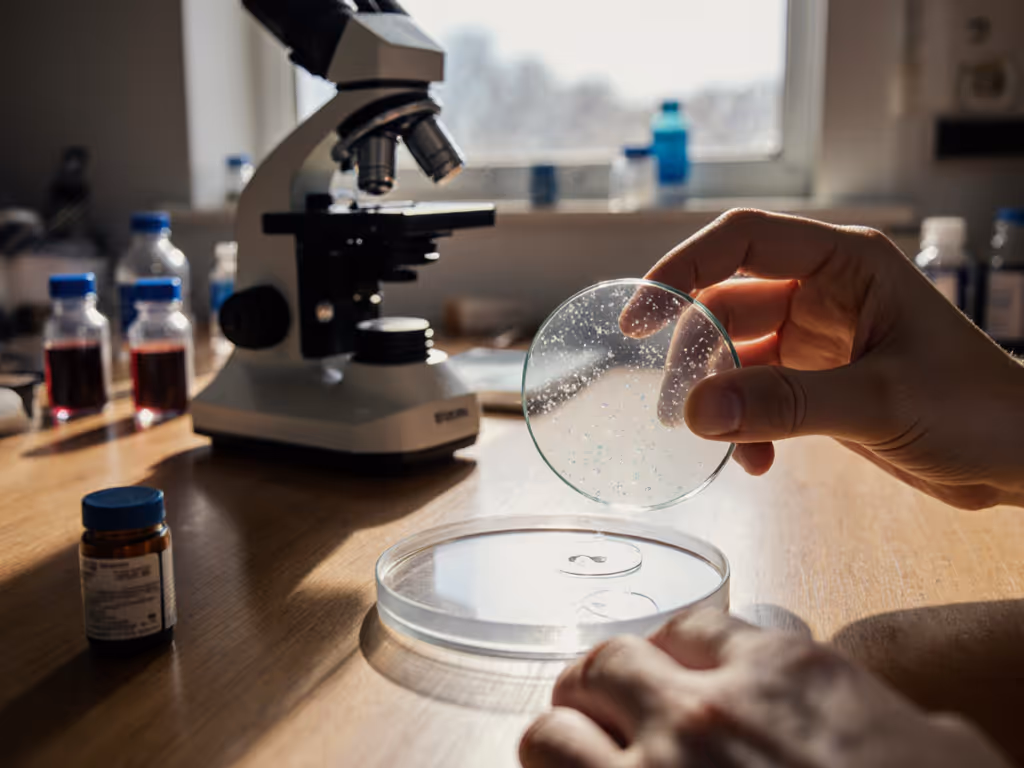
A wet mount is simply your specimen suspended in a drop of liquid between slide and cover slip. This technique solves the biggest headache for newcomers: blurry, out-of-focus images. The liquid medium bridges the gap between specimen and glass, eliminating air pockets that distort light paths. Unlike permanent slides that require special equipment, wet mounts need just three things: a slide, cover slip, and dropper.
This wet mount technique is forgiving for beginners because:
- Mistakes are easily corrected (just lift the cover slip and adjust)
- No toxic chemicals needed for basic observation
- You can watch living organisms move in real time
Start simple, learn fast (that's my mantra for beginners). Your first wet mount might not be perfect, but you'll gain confidence through immediate feedback.
What basic tools do I really need for successful microscope slide preparation?
Forget expensive kits. For clear wet mounts, you only need:
- Plain microscope slides (standard 1x3 inch glass works great)
- Cover slips (thin squares that flatten your specimen)
- An eyedropper or plastic pipette ($2 at craft stores)
- Distilled water (prevents mineral deposits)
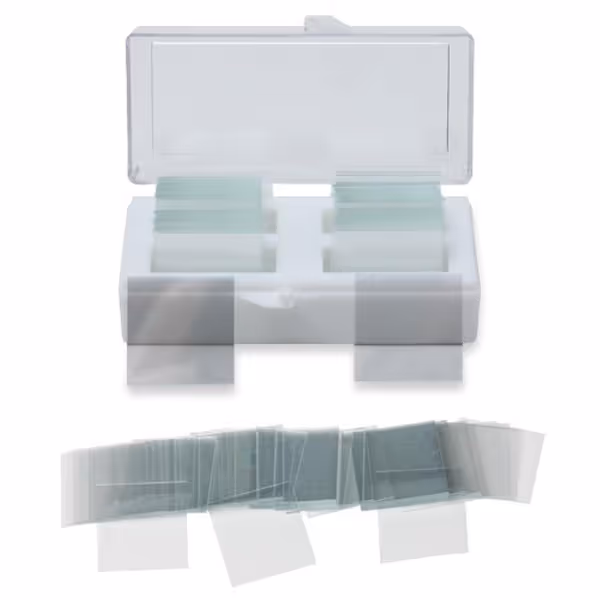
Standard Microscope Cover Slips
Crystal clear cover slips for distortion-free, enhanced microscopic viewing.
$8.24
Thickness0.13 - 0.16 mm
Thickness0.13 - 0.16 mm
Pros
Superb clarity and flatness
Minimizes fogging and sticking
Cons
Inconsistent pre-cleaning reports
Customers find these microscope cover slips to be of excellent quality, crystal clear, and good value for money. They work well for their intended purpose, with one customer noting they're particularly suitable for fecal tests.
Customers find these microscope cover slips to be of excellent quality, crystal clear, and good value for money. They work well for their intended purpose, with one customer noting they're particularly suitable for fecal tests.
Many beginners waste money on "starter kits" packed with rarely used items. I recommend focusing on quality cover slips (they make or break your results). Cheap ones often have thickness variations that cause focus issues. Look for #1 thickness (0.13-0.16mm), which works with most beginner microscopes. The slight investment pays off when you're not fighting blurry images.
How do I avoid the dreaded air bubbles that ruin my view?
Air bubbles are the #1 frustration in specimen preparation guides. The secret isn't fancy gear, it's technique. Try this scaffolded approach:
- Place your specimen on the slide
- Put one drop of water next to it (not on top)
- Angle your cover slip at 45 degrees
- Gently lower it like a drawbridge onto the water
This method lets water flow evenly under the cover slip, pushing air out the sides. If bubbles persist, try these fixes:
- Tap gently with a pencil eraser
- Add a tiny extra drop of water at the edge
- Use distilled water (tap water's minerals cause more bubbles)
Small wins today grow into tomorrow's confident discoveries. That first bubble-free slide feels like magic!
Can I safely stain specimens without special equipment?
Yes! Basic microscope staining methods don't require lab-grade chemicals. For beginners, I recommend these safe, accessible options:
- Iodine solution (from first aid kits) for plant cells
- Food coloring (1-2 drops in water) for contrast
- Methylene blue (diluted eye drops) for animal cells
The key is "vital staining": using just enough stain to highlight structures without killing living specimens. For cheek cells, try this:
- Make a standard wet mount
- Add one diluted methylene blue drop at the cover slip edge
- Watch as capillary action draws it under the slip
Avoid complex staining protocols that require heat or toxic chemicals. My workshop participants achieve amazing results with diluted over-the-counter solutions (proof that you don't need professional labs to see cellular details).
How can I make temporary slides last longer for observation?
True permanent slide making requires specialized equipment, but you can extend wet mount life significantly:
- Seal edges with clear nail polish (let dry 5 minutes before viewing)
- Use thicker liquids like glycerin for slow-evaporating mounts
- Store slides flat in a sealed container with a damp paper towel
For most beginners, slides lasting 30-60 minutes is ample time for exploration. Focus on observing living processes rather than archival quality. Remember that nine-year-old I mentioned earlier? She didn't need permanent slides (just enough time to witness tardigrade movement before preparing a fresh mount).
What's the most common beginner mistake you see?
Overcomplicating! People think they need:
- Expensive prepared slides
- Specialized mounting media
- Complex staining protocols
In reality, I've seen kids discover pond life using smartphone flashlights and slide sandwiches made from old picture frames. The best specimen preparation guide starts with what you have. Try this challenge today:
- Collect rainwater in a jar
- Place one drop on a clean slide
- Add a cover slip using the drawbridge method
- Observe at 40x-100x magnification
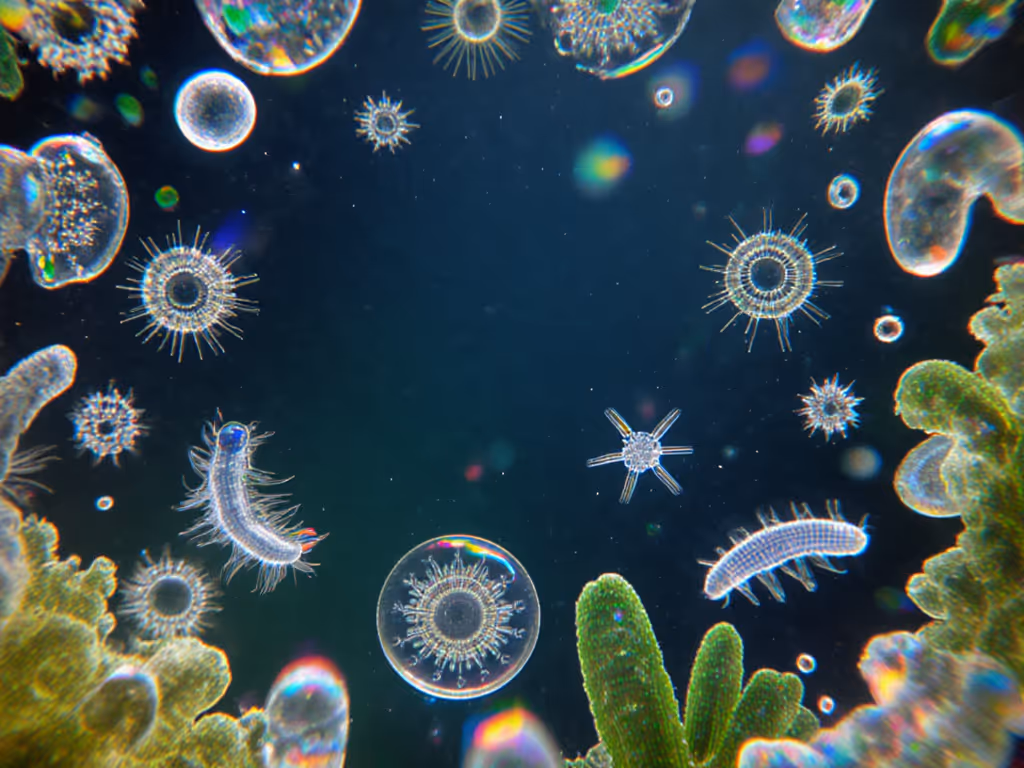
You'll likely spot moving organisms within minutes, no fancy gear required. This is where real microscopy begins: with accessible tools and clear steps turning curiosity into repeatable discovery.
Building Your Confidence One Slide at a Time
Mastering wet mounts isn't about perfection (it's about progress). Each slide teaches you something new about specimen behavior, liquid properties, and light interaction. When you inevitably get a blurry image or trapped bubble, remember it's not failure; it's data collection for your next attempt.
Last week, a retiree in my workshop gasped when she finally saw onion cells clearly after three tries. "I thought I needed better equipment," she said, "but it was just how I placed the cover slip!" That moment captures why I love beginner microscopy: the tools are simple, the barriers are low, and the wonder is real.
Ready to Explore Further?
Don't stop at plain water mounts. Try these gentle next steps:
- Compare tap water vs. distilled water specimens
- Observe how sugar concentration affects pond organisms
- Create comparative slides of different plant tissues
Document your journey with phone-to-eyepiece photos (a $5 adapter works wonders). Share findings in online communities; many beginners report their discoveries spark others' interest too.
Your microscope's potential isn't limited by your equipment budget, but by your willingness to experiment. Start simple, learn fast, and watch as ordinary household items reveal extraordinary worlds. What will you discover in your next drop of water?
Related Articles